
Silver is one of the most precious metals on our planet. It is also one of the most widely used materials for expensive jewelry, aside from metals like gold and platinum. The many alloys created from the combination of silver with other metals are all considered precious metals and are often used to make luxury items. However, these luxury items do age and they do tarnish. Though our silver doesn’t tarnish, or at least not nearly as fast as alloys, it is also way too soft to be used for making jewelry or cutlery, so most of the time, the things you call silver will be alloys, usually Sterling silver.
Since alloys like Sterling silver do tarnish, and they can do so quite quickly, you will need to either take them to a professional refinisher to polish and finish them for you, or you could learn how to polish your silverware at home and save a bunch of money! In this text, I have compiled a step-by-step guide to polishing your silver and silver jewelry, so if you are interested in giving those old metals a new shine, read on!
Step 1: Determine Whether It Is a Silver-Plated Object or a Silver Object You Are Working With
A major step that has to be completed before you even start to pour water into a bowl is to determine whether your silver item is truly made of silver or perhaps is only silver-plated. Determining this can change the course of action you have to take completely, which is why it shouldn’t be skipped.
If you happen to have a fully silver object, first of all, that is great news because that is worth a lot more than silver-plated objects usually, but second of all, you can easily clean it at home with no worries if you follow the steps in this article.
However, if you own a silver-plated object, you might have to be more careful with it. Tarnish has the characteristic of turning the silver plating into a layer that can start to flake and come off very easily. The reason this is bad news is that it is likely that either soaking the object in a solution meant for cleaning silver or perhaps brushing the surface with a metal polisher will just aid in the chipping and flaking of the metal and can cause damage to your valuable item.
If you have a silver-coated item that is starting to chip and break or just heavily tarnish, I would advise you to take it to a professional workshop, where they can try to handle the situation with professional tools, skills, and materials, although it still won’t be a guarantee for saving your beloved item.
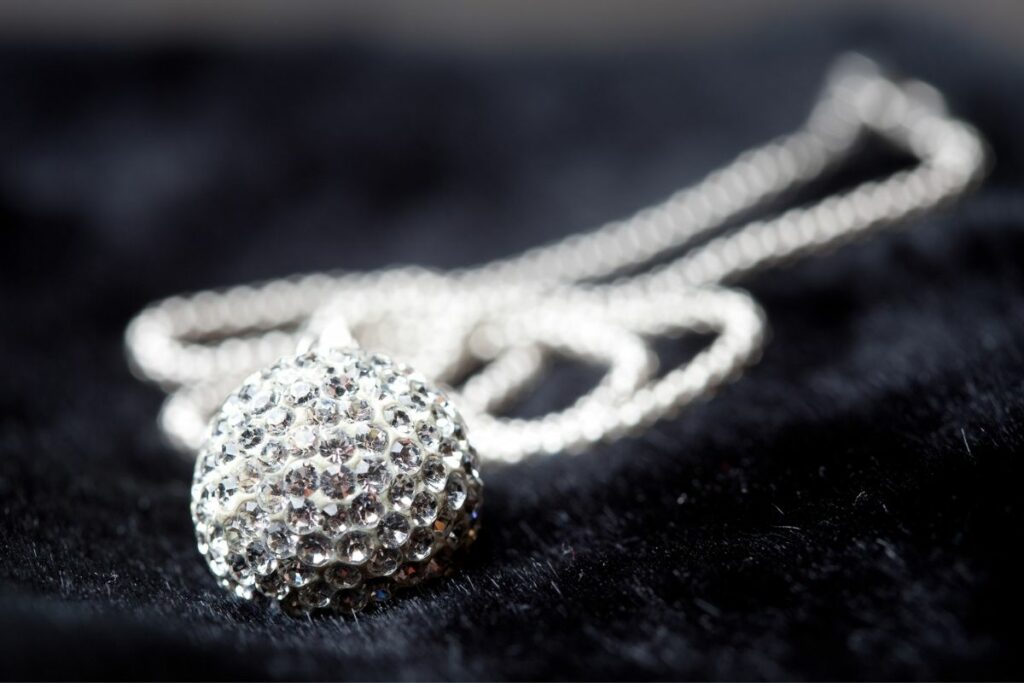
Method 1: Bowl Method
Since there are two main methods to do this right, I have divided the article in a way in which you can clearly see the steps for each method and decide which is best for you. The bowl method, the one I am going to describe in detail in this section of this article, is better for smaller items like jewelry, which are hard to clean easily with your hands or any type of brush.
Step 1: Prepare a Bowl
The first step is to wrap a bowl in aluminum foil completely. The reason you are doing this is to prevent the solution you are going to use to clean the silver from damaging the bowl as well.
Wrap the bowl tightly, and in a way that preferably no water touches the bowl when you fill it up or at least minimize the amount of it.
Step 2: Fill the Bowl With the Cleaning Solution
Now, you can either choose to use some metal polisher that you can buy in almost any hardware store, or you can make a homemade solution that is just as effective. For the store-bought solution, I will link a couple of metal polishing liquids and pastes at the end of the article so you can invest in one if you want to polish it often or if you have different types of metals to polish.
For the DIY option, put 1 tablespoon of baking powder and 1 tablespoon of salt into the bowl. Pour in warm to hot water, and then mix to combine properly.
Step 3: Submerge Your Jewelry in the Bowl
Now, it is time to place the jewelry you want to clean and polish straight into this DIY or store-bought mixture, and leave it there for about 10 minutes (more or less, depending on the amount of dirt and tarnish there is on your silver item.
When you leave the silver in this water for 10 minutes, the salt and the baking powder work together to clean the jewelry in every nook and cranny, and through chemical processes remove all tarnish and restore a shine as well.
The great thing about this method is that you can be sure that the water will get into every small hole on your jewelry, or get through every link of a super-fine chain. There is no part of the jewelry that will remain dry and untreated if you submerge it into this solution, which then can provide an even and all-around clean shine.
Step 4: Remove Your Jewelry
After the 10 minutes have gone by, take out your jewelry, pat them dry with a paper towel and leave them to dry in a well-ventilated and warm area so that there is not a drop of water that stays on them. If you have completed this step, your jewelry should be shiny and clean, looking well-polished and taken care of.
You can also repeat this process if you think that your jewelry isn’t clean enough, just be careful not to overdo it, since the solution can damage the exterior of the metal if it is left inside for too long.
Method 2: Using a Cloth/Steel Wool and Metal Polisher
This method, in which you should use either a cloth, a foam sponge, or fine steel wool, is meant for larger silver objects with more tarnish on them. This is not practical for smaller objects, since you might not be able to reach every part of them with this method, which will result in uneven cleaning.
Anything that is about the size of or larger than a set of silver cutlery can be treated with this method, but make sure that you only use it for items that have reachable surfaces all around.
Step 1: Choose Your Tools
The first step, as always, is to gather the tools and items that you are going to need. In this case, you are probably going to need either a piece of soft cotton cloth, a soft foam sponge, or in worse cases, a fine steel wool ball.
When deciding which one to use, you should take into account the amount of tarnish on the given silver object that you are wishing to clean and polish. The less there is, the softer the tool you are going to use should be in order to avoid potentially scarring and damaging the metal. Only use steel wool if your silver is really tarnished, but not so much that it would be better to take it to a professional workshop.
Also, the steel wool should not be rougher than grade 00, and it should be preferably below that. Even the finest steel wool will be able to take off the tarnish most of the time, so getting something rough and highly abrasive is not a good idea for a polishing job.
The next important tool you should choose is a metal polishing liquid or paste. Check out the products linked at the end of this article if you are looking for high-quality, affordable options.
If you do not want to or can’t afford to buy metal polishing liquids or pastes, you can also make some DIY versions at home. Here are some options:
- Mix three parts baking soda to one part water to form a paste.
- Mix equal parts baking soda, salt, and water to form a paste.
- Use ketchup as your paste!
Step 2: Clean Your Silver
Use some warm water and dish soap with a sponge or cloth to just remove any excess dirt, dust, or other particles from your silver items, this way you will be spreading your polishing paste or liquid on a clean surface, which will increase effectiveness. Don’t scrub at this point at all, be gentle but thorough.
Step 3: Polishing Your Silverware
At this point, once your silver item/items are clean, you can start to polish them. You can do this by taking the tool you chose (cloth, sponge, or steel wool) and applying the paste or liquid of your choice to the surface of the silver. Again, make sure that it isn’t only a silver coating since the solutions and pastes can damage the thin layer of silver instead of just polishing it.
When the paste or liquid is generously applied to the entire surface of the silver, depending on the severity of your case, you can either rub it in softly, start to rinse it immediately, or even wait for it to just sit and do its thing for 10-30 minutes. Make sure you don’t overdo it and scratch or damage the surface of the item. If you are unsure, it is better if you rinse off the solution or paste from the item and then reapply it if necessary.
Step 4: Let it Dry
At this point, you have either applied the paste or liquid, rubbed it on the surface of the silver for a while, or perhaps left it to work its magic for 10-30 minutes. Either way, the polishing is done, and you have to rinse and clean off the chemicals on your silver. Some store-bought options don’t require you to rinse off the liquid, but rather should be left on to dry in order to create a protective layer on top of the surface of the silver, but you should always check this on the box or the packaging to not accidentally damage your silver.
After rinsing the pastes and liquids off thoroughly (or letting them dry onto the silver in some cases), you have only one step left to do: let the item dry completely. Place it in a warm and ventilated place if you want it to dry as fast as possible since water on the surface of silver alloys is a recipe for quick tarnish development.
Once the water has evaporated completely, your silver should look as good as new!
What is Sterling Silver Exactly, and Why Does It Tarnish?
Pure silver is as expensive as it is soft. It is not used to make almost anything, since it deforms quickly and is also hard to shape. Pure silver is a metal that consists of 99.99% silver, and only 0.01% of trace minerals and metals. A way to increase the durability, toughness, and also shine of silver is to combine it with another metal to create an alloy. These alloys are usually made with other precious or semi-precious metals like platinum, gold, zinc, copper, or nickel.
Sterling silver is an alloy, which means that there is another metal (or more) added to the silver in order to improve on some aspects of the metal. Sterling is generally an alloy of exactly 92.5% silver and 7.5% copper, though sometimes the copper part is mixed with other materials like nickel or platinum.
What copper does is that it actually toughens up the metal to the point that it can be forged and shaped a lot more easily, and it can also retain its shape for a lot longer period of time. Also, it might be counterintuitive, but adding copper to silver actually makes the alloy shinier and more glamorous-looking than pure silver is. Pure silver tends to be duller and to look more like a mineral than precious metal, and with time, the outer layer of it can also become somewhat darker than the inside layers, causing it to look even less fancy.
But why does a more durable and tougher metal alloy tarnish? Tarnishing has actually nothing to do with material hardness, and everything to do with the material’s reactivity with its surroundings, which is usually air or water.
Most metals tarnish over time, which means they develop some form of discoloration and an external texture almost like rust, but not as rough. Iron is the only material that develops rust, which happens due to oxidation, but the other metals usually react with the sulfur compounds in the air to develop this tarnish.
Thus, the reason why sterling silver tarnishes is that it has a higher percentage of a different metal that is not silver, which makes it much easier for it to tarnish. This still puts the time needed for tarnish to develop in the “years” category most often, but by adding another metal, the time frame is significantly reduced.
Seeing as most silver you will have either as jewelry or cutlery is either sterling or some lower-quality silver alloy (which only means that it has a smaller percentage of silver in it), this step-by-step guide to polishing your silvers is mostly aimed at sterling and other types of alloys.
Best Silver Polishing Products on Amazon
Goddard’s Silver Care Liquid Dip – 10 oz.
For astounding value-for-money, you should definitely check out Goddard’s Silver Care Liquid Dip, which will allow you to clean your silver quickly and effectively, while also leaving a long-lasting shine on it. This product ships to almost anywhere in the world and is also very high-quality, so if you are looking for a silver care liquid, it should definitely be one of your first choices. Check it out here on Amazon!
Hagerty 17245 Flatware Silver Dip, 16.9 fl. Oz
Hagerty is a great brand when it comes to silver and metal care, and this product is one of their most interesting and effective ones. Since some of the most common items made out of silver are cutlery items, this silver polishing and cleaning liquid comes in a container that fits most cutlery items. All you need to do is dip the fork, knife, or spoon into the container for a short while, and when you take it out, you will be greeted by an amazing shine and a clean look. Check it out by clicking on this link to Amazon!
Hagerty Silver Foam Silver Cleaner, 19-Ounce
Unsurprisingly, another Hagerty product makes the list. This 19-ounce silver cleaning and polishing paste/foam is meant for the more sensitive items and objects, so if you have an older set of cutlery or some sensitive and delicate jewelry, there is no better product for it than this one. If you are interested, check out this product by clicking on this link to Amazon!