
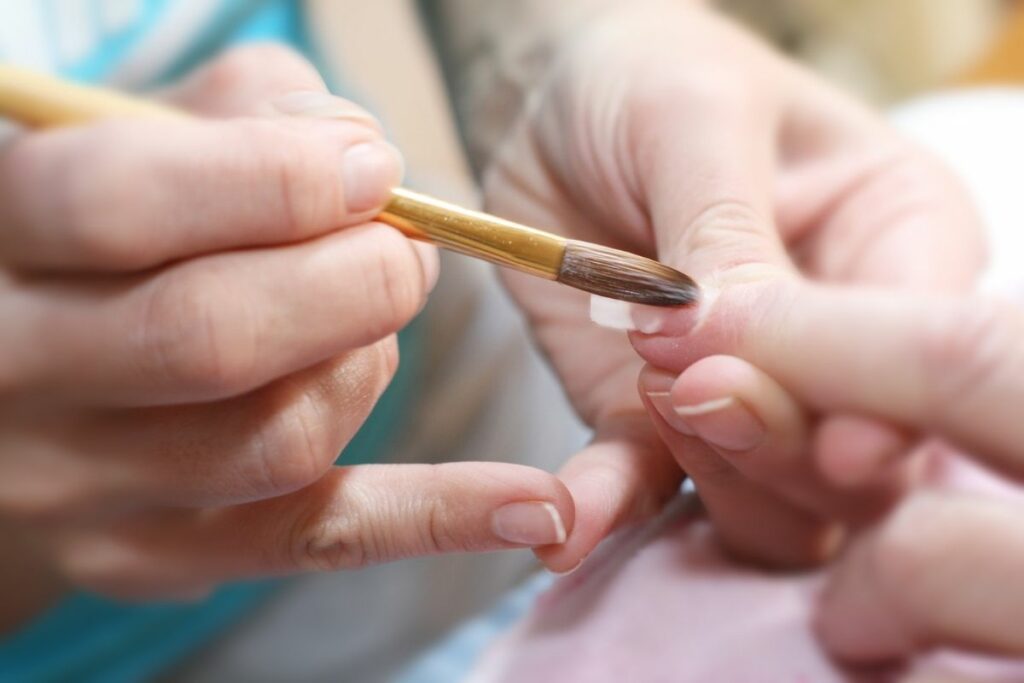
If you want to use your acrylic nail brushes longer, you have to clean them after every use. It is crucial if you work or have a business such as a nail salon. You need to maintain your nail brushes and ensure it is in top condition. Some acrylic nail brushes, when left unclean and are not stored correctly, will not be functional. Dirty nail brushes are unhygienic, and will not look professional, also, you will have a hard time using them to create the perfect design.
You may wonder how to clean acrylic nail brushes. Below, let us discuss further acrylic nail brush cleaning and its maintenance.
Removing dried acrylic from a nail brush?
Leaving dried acrylic on your nail brush is the fastest way to damage your nail brush. It will guarantee that you won’t use your brush next time for your nail design. There are ways you can keep the acrylic from drying out or remove the dried acrylic from the nail brush.
Suspend the brushes and soak them in a container with acrylic liquid. It will also help to soak the brush while keeping the bristles straight. Nail brushes that have harder acrylic may need a few days of soaking. If you want to mix the monomer with acetone, this is also allowed, but since acetone evaporates faster, you need to put a lid on the container.
Do not allow the acetone to completely dry up as it can slow the effect of the dried acrylic removal.
Once the brushes are clean, do not forget to clean them with monomer after every use. It will help maintain efficiency. Also, any lint-free cloth can remove any dirt or dust from the brush.
How to avoid your acrylic nail brush from getting rigid?
After use, you should wipe the nail brushes with a clean cloth. Use acrylic nail liquid or monomer to wipe the brushes gently. It can ensure that the nail brush will not harden due to nail color.
For a tough to remove acrylic and those that already harden, you may do the following.
- Get a shallow container and fill it with monomer nail liquid.
- Soak your brushes in it for 2 hours or longer. You may also do it overnight if the acrylic hardens and is difficult to remove.
- Remove the brushes after soaking and leave them on top of a clean towel and let them dry naturally.
- When the brushes dry up, give them another soak for an hour or two.
- Remove the brushes, lie them flat on a clean cloth, and air dry.
Repeat the process to ensure that you remove acrylic build-up and the brush won’t have any clogging or clumping after.
Can you remove the acrylic from a nail brush without using acetone?
Some users prefer acetone thinking it will remove the clogging. However, some natural brushes get damaged with acetone, and other synthetic brushes, though sturdier, can get damaged in the long run.
Also, some bristles get fanned out, giving a not-so-efficient performance or thinning the bristle.
Synthetic brushes can be cleaned with acetone but not too often. Natural hair brushes also get damaged quickly.
Some users see it better to clean the nail brush without acetone or any liquid cleaner with no acetone content. Some cleaners have a percentage of acetone added to the ingredients. Check the ingredients carefully before use.
Using monomer to clean brushes is better, and it is a better substitute than acetone.
If there is no monomer to use, this is the time to use acetone as a way of cleaning your nail brushes but ensure you do not soak the brushes longer than you should. You may also use a cloth with acetone to wipe the brushes and then dry them thoroughly.
How can I clean my nail brushes?
You can keep your nail brushes clean and efficient so you can use them every time you need them. Removing any residues after each use is the most effective way of keeping your brush usable. You may also utilize a dedicated brush for each type of design you are doing.
Place a small amount of brush cleaner in a container, then dip the brush hairs in it and gently apply pressure to the brush so the sides are soaked. Make sure that each bristle is coated with brush cleaner.
It is not ideal to use the remaining brush cleaner in the container for your cleaning next time. It should be disposed of, and wash the container where you cleaned the brush thoroughly to remove any sticky residues.
Do not use soap and water to clean your nail brush, and keep acetone to a minimum and as needed. Not leaving your nail brush with a sticky substance or any other nail polish will ensure its longevity.
Store correctly. You may store the nail brush in storage after cleaning. You can wrap the nail brushes in a paper towel after cleaning and keep them flat in a drawer where it is safe from dust and dirt. Some users store their brushes in an upright position which can drain inert monomer to drip downwards, while storing the nail brush in a downward position, which will deform the brush. Letting them stored laid flat is a better way of keeping them.
It is also not ideal to leave them exposed to the sunlight or the UV lamp cause this will get the gel product cured in the brush, which can cause irreversible damage. If there is an available brush cap, use this instead to keep the bristles safe from drying.
Do not leave the brushes with extra moisture or brush cleaner without drying them up cause this will also not have a good effect on the bristle. By maintaining your nail brushes, you are guaranteed longer working nail brushes and save you money in the process.
Why is my acrylic sticking to the brush?
If the acrylic is sticking to the brush, it may mean the ratio of the liquid to powder percentage is not balanced. It may also mean that the brush is too wet when applying the nail color.
The temperature may also affect the acrylic sticking to the brush. When applying the product, ensure that the surrounding area’s temperature does not have a huge effect and will not have any difference on the application.
There are also types of setting powder to help with temperature irregularity.
Sometimes many factors cause the acrylic to stick to the brush and need a bit of cleaning before use. You may also dip the brush in powder to stop the acrylic from sticking to the brush.
How do you clean new acrylic brushes?
New brushes are prepared with Arabic gum to keep them in shape. It is a starch film that needs removal before use. Not doing so can have irreversible damage to the brush and requires complete removal.
When you remove the film, get a lint-free towel to skim the brush head. Getting a liquid cleaner to submerge the head of the brush is next. Always use a clean monomer instead of a used liquid cleaner, as this will contaminate your new brush. Thoroughly soak the brush in the new monomer to separate the strands and help to spread the bristles to get it ready for use. Repeat the process as required if you see the bristles still not spread and separated.
Once you see the result, you want to clean the brush and dry the excess fluid. All liquids sticking to the brush should be eliminated to help dry the brush.
You may also store the brush after preparing them for use by lying them horizontally or by hanging them upside down.
When to consider replacing your acrylic nail brush?
When the bristle appears frayed
The life span of the nail brush can last depending on how you maintain it. Some brushes are expensive and can last longer, but when used incorrectly, they can also affect longevity. There are low-priced nail brushes that can last longer with the right cleaning and care.
When you find it difficult to use the brush
If you find it hard to use the brush and gets more challenging every time. It may mean you need to replace your nail acrylic nail brush. Sometimes this is a good indication that the brush is not in its original form, bristles are clogged, and cleaning it with monomer no longer works.
When bristles don’t snap back in place
It means a replacement is required when this happens to cause the bristles when you press it down should be back in their original form, and if it stays folded or curved, there is no further use for it and will not give you a good result.
The brush can no longer control the product flow.
It means the bristle can no longer hold the product, and it is not letting it stick to the bristle during application. Each piece of the brush should still carry the required amount of nail color with every application.
If it is not giving the result you expected
Some brushes can last for up to 12 months. Other brushes for half a year. These brushes are used for many applications before they require replacement. If the brush no longer works as it used to and cleaning is no longer effective, it is time to replace them with a new one.
When small bristles are sprouting in place
The acrylic brush needs replacement because it no longer has the original bristle size. Bristles will be effective if it has the right consistency and texture, otherwise, they will not be as useful.
When the bristles become stiff
The brush should have the right bounce and firmness. Anything excessive will not give you a great result for your nail art.
What is the fastest way to ruin your acrylic nail brushes?
Use of soap in cleaning it
Using your acrylic nail brush and cleaning it with soap can cause serious harm to it. Using liquid cleaner or a monomer for cleaning is required. Soap can dehydrate nail brushes, and if you use anti-bacterial soaps or even hot water to dip the nail brush, it may have a damaging effect.
Using the brush for other purposes than the one it is intended for
It is not to be played with by kids or your pets, and not used for painting or to creating other visual arts. Some brushes may look as if they can take the task, but once you use them for their original purpose, they may not work as they should.
Storing it with the brush down
The brush can be deformed if you store it with the brush downwards in a container. You can instead store the brush lying flat in a clean cloth or a paper towel and leave it in an enclosed, dirt-free space.
Soaking the nail brush for too long
Cleaning your nail brush in a cleaning solution should depend on the brush cleaning requirement. If it only requires wiping with the liquid solution instead of soaking it for a few hours this is what you should do instead.
Storing wet nail brush
It must be wiped dry or air dried before placing it in storage. It will ensure that the moisture will not stick to the brush. Also, if you want a long-lasting brush, always air dry it after cleaning with a monomer or liquid solution.
Covering the nail brush with a cap while it is damp
Placing the cap after soaking it in the liquid cleaner is not a good idea. Dry the brush first before you use the cover. It can ruin the shape of the brush as well if you do this.
Leaving the brush with molds
Once you see molds appearing, this means you need to replace the brush and not use it for your nail art. It is dangerous for your clients or yourself if you use a brush with mold growth.