
In addition to refrigerators, washing machines, and ovens, freezers are one of the most important household appliances, since they make it easy to store perishable food over a long period. For this reason, the freezer must be regularly defrosted and cleaned. What exactly should you do to defrost a freezer the right way?
The freezer must first be unplugged to let the ice melt. You should place a bowl and towels around the freezer to soak up the water and not damage the floor. After the ice has melted, wipe the inside of the freezer with a cloth soaked in vinegar and water. After cleaning, let the freezer dry.
Cleaning and defrosting a freezer can take up a lot of time, so make sure you have a place to store the food. There are several ways to defrost a freezer, but we bring you the most efficient way of doing it.
Why should you defrost a freezer?
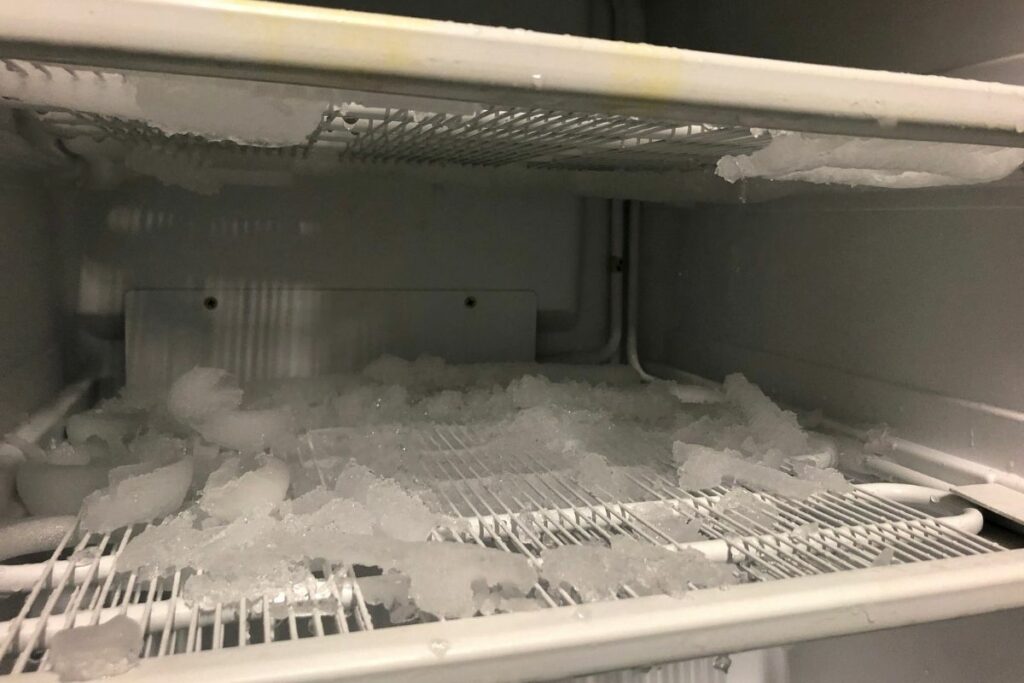
Although rarely does anyone adhere to this, the maximum ice thickness in your freezer should never exceed 1 cm. It would be ideal to defrost the refrigerator’s freezer after 5-6 mm of ice thickness.
If used properly and closed well, you should defrost the freezer 1-2 times a year. But if there is a high degree of humidity in the apartment or room, then this procedure must be repeated more often.
How often you need to defrost and clean the freezer depends on the age, function, and condition of your freezer. The season also plays an important role. They need to be defrosted especially during summertime since the device has to expend more energy to compensate for the warm air indoors.
The appearance of ice is caused by the entry of warm air into the freezer at the time when the door is open. If you notice that the ice coat is growing too fast, the most common reason for this is damage to the thermostat or the sealing rubber.
Ice is also formed due to the penetration of moisture into the freezer. Appears in the refrigerator with food. When a person opens the freezer door, moisture accumulates in it. It stays on the walls, taking the shape of ice. It becomes difficult for a person to push containers and freeze new products.
The layer of ice, and especially the thick layer of ice in the freezer, not only complicates access to the products, but also the compressor works more with less efficiency, while at the same time increasing the electricity bill.
The thick ice crust creates a risk of breakage, heat exchange is disrupted, the cooler is lost from the specified mode of operation. Under the weight of ice, individual components of the cooler become useless over time.
Any contamination that is not removed in time, is a potential source of infection and opens the possibility of the spread of unpleasant odors. Before placing food in the freezer, make sure that the packaging is completely dry.
It is important to defrost a freezer to maintain its efficiency. The build-up of ice can stop the cold air from circulating properly. To prevent the ice from building up you can coat the walls, drawers, and chamber of your freezer with oil. This will result in a slippery surface on which ice will not be able to form at all.
The freezer should be defrosted to prevent odor from appearing. Several reasons contribute to the formation of odors from the freezer. Product expiration is one of the main causes. Another problem is the issue with the freezing system and a clogged drain hole.
Even though the freezer works at a low temperature which kills most bacteria, some are still present. Most bacteria in deep ice become inactive, so freezing acts as a pause button. But that means that when food is defrosted, the bacteria become active again. For this reason, you should not freeze food that has once been unfrozen.
Meat is a food that most people consume almost daily. Yet many do not know how to treat meat, or what fresh meat looks like, how it is stored and frozen. To freeze the meat properly, it is best to store it in a bag and squeeze the air out of it. This will prevent dehydration that leads to certain processes and the creation of unpleasant odors.
Store all strong-smelling foods in hermetically sealed containers.
When you’re defrosting a freezer and if you leave it defrosted for too long in a room with high humidity, mold will appear. It is important not to turn on the freezer and start storing food if you haven’t got rid of the mold. Mold will not grow in the freezer, but they can survive in it.
When you’re cleaning out the freezer, make sure you do research and find what and how long some groceries can be stored in the freezer.
How to defrost a freezer?
First, check if your freezer requires a defrost process, as in some models it is no longer required. You can find this information in the manual or instructions for use of your device. If you do have to defrost it, proceed with the defrosting process.
Set the refrigerator temperature to 0 degrees, then unplug it and open the door wide open. Remove the removable parts, wash them with a mixture of water and liquid soap, then leave them to dry. Clean the inside of the freezer with the same solution.
Remove all food from the freezer. It is good if you have planned the defrosting of the freezer and were able to organize the temporary storing of all frozen foods. If you’re doing this in the winter, place the food out on the balcony.

If it is hot outside, it is better to leave groceries at home, putting ice packs on the packaging. There are special cooler bags. You can store food for a certain period. There is also a super-frost mode on some freezers. It must be turned on one day before defrosting the freezer.
If your freezer does not have a liquid collection container, place towels or several layers of newspaper on it and a pallet on the bottom. Place towels or cloths on the floor next to the freezer to soak up the water.
If you want to speed up the defrosting process, you can do it manually, by removing the ice that is stuck to the walls of the freezer. Do not use sharp objects such as knives, screwdrivers, and similar tools to remove ice, as this may permanently damage the freezer.
The ice in the upper compartment, where the cooling pipes are located, will not be easy to remove. It is good to speed up the process of defrosting using hot water.
To speed up the process of defrosting you can place a hot water bottle filled with warm water in the freezer. Use a bowl, plate, or a pot filled with boiling water. The steam will help with the faster melting of the ice. Change the water as it cools. Do not place the boiling pot without a plate so as not to damage the plastic. After 30-60 minutes the coat of ice should begin to separate.
Another common way to defrost is to use a hairdryer and warm air. While this is one of the fastest ways, it shouldn’t be used for safety reasons. Water and electricity in the same place are not a winning combination.
If you do decide to use a hairdryer though, pay attention to two things. The power cord must not come into contact with water. The hairdryer must be far enough away from the inside of the freezer. The first is for your safety and the second is for the safety of the freezer. Hot air can damage the indoor unit.
If you don’t want to use the hairdryer and if you don’t have too much ice buildup, use alcohol. Rubbing alcohol will speed up the process of defrosting. Use a towel and pour a little rubbing alcohol on it, then start rubbing the frosted area with it. The ice should start melting away easily. This method will help with thin layers of ice.

After all, the ice has melted and the water has picked up, take a few more minutes to wash the freezer and remove any unpleasant odors that may appear. Make a solution of water, baking soda, and a little alcohol vinegar and wipe the inside with it.

We recommend that you do not use detergents or other chemical products to clean the inside of the freezer, as they may not be completely removed, and this may affect the taste of the food. Natural cleaners such as vinegar, lemon, baking soda are very effective.

Baking soda absorbs odors so that your freezer will have a pleasant smell. Vinegar and water will help to remove any stains that have settled in the freezer. If you wipe the moldy part in the freezer with clean vinegar, you will remove all moldy deposits and spores that are otherwise dangerous to health.
The last step you need to do is dry the freezer. Take a towel and soak up all the remaining water in the freezer. This will prevent the rapid accumulation of ice and the need for an accelerated repetition of the process.
Before the next filling and freezing of the product, it is recommended to leave the refrigerator for about 90 – 120 minutes with the door open, then turn it on and let it run empty. When the desired temperature is set in the chamber, you can put the products inside.
As you refill the freezer, allow proper airflow by leaving space between the walls and the items as well as between the items themselves. This will help freeze the food properly and can reduce freezer burns.
If you use containers to organize similar products, use open-ended ones such as wire containers. The open sides and bottom will allow air to flow.
Return the food, turn on the freezer, and your job is done. Be sure to clean and discard any spoiled food immediately. Do not put it back in the freezer. You won’t waste a lot of time, the freezer will work better, cool faster, consume less electricity, and look nicer.
What to look out for when defrosting a freezer?
Watch out for the ice
Do not cut, scrape or collect ice with a knife. This can damage not only the plastic but also the channel under it. If you penetrate through the plastic, you can damage cords that are responsible for the temperature in the fridge.
Also, watch out for the big pieces of ice. Why they are forcibly removed, they can fall hard on the floor. The ice is very heavy, and it can damage the floor. If you are too close it can fall on your feet and cause injuries.
Make sure there is no electricity around. If the ice falls on the floor, it will melt and make a puddle. That’s why you need to pick up the ice as soon as it falls. Put the big chunks of ice in the sink and let them melt.
Take care of the sealing rubber
Sealing rubber can be found on the door of the freezer. Its main purpose is to keep warm air and moisture out of the freezer. Clean the door seals with a soft cloth dampened with soapy water or diluted detergent.
When heating the ice layer with a hairdryer or fan heater, do not direct the flow of hot air directly to the sealing rubber. Otherwise, it dries and deforms. If this happens, warm air will constantly enter the chamber, which will interfere with the operation of the freezer and cause the rapid appearance of a new ice coat.
Don’t be too harsh with cleaning
Do not use hard brushes, steel wool, abrasives, and organic solvents (such as alcohol and acetone), boiling water, or acidic and alkaline agents that can damage the outer and inner surfaces of the freezer. Direct contact with boiling water and organic solvents can deform or damage plastic parts.

Dust behind the freezer and from the floor should be removed regularly to improve cooling performance and save energy. Do not rinse directly with water or other liquids during cleaning to avoid short circuit or damage to the electrical assembly.
Hard-to-reach places in the freezer (e.g. openings and corners) should be cleaned regularly with a soft cloth, a soft brush. When necessary, use aids such as wooden sticks to prevent dirt from accumulating in these parts.
Unplug the freezer and open the door
Remember to always turn off your freezer and unplug it from the electricity source. By unplugging it you will avoid wasting energy while you’re cleaning. You will also avoid any accidents since water and electricity don’t go well together.
To defrost properly, keep the door wide open. Some freezers have automatic doors, which means they will close if you’re not holding them. If you have automatic doors, put a stopper to keep it from closing. If you want to defrost your freezer and leave the doors closed, it means that you’re trapping the cold air and not allowing the warm air to come in.
Some people think that if they close the door, they will the melted ice from dripping onto the floor. If you close the door you will prolong the defrosting process.
Clean everything properly
When you’re cleaning the freezer, don’t think about cleaning the interior. You should also think about the exterior and what to clean on the outside. Cleaning the outside is quite simple. Just use a mild, non-abrasive cleaner and a soft sponge or cloth to wipe the front and sides of the freezer.
Remember the condenser threads located on the back of the freezer, close to the floor. They are crucial for heat dissipation and maintaining the appropriate temperature in the freezer. However, over time, a significant amount of dust accumulates on them, if they are not checked periodically.
Vacuum all the dirt and dust from the coils with a vacuum cleaner. Set the vacuum cleaner on the lowest sucking power and gently pick up the dust. Dust that accumulates on the condenser reduces the operation of the appliance and increases electricity consumption.
Regularly check the power
When you’re done cleaning the freezer, make sure you plugged it in properly. If you don’t plug it in all the way you’re risking the freezer plugging out and defrosting itself. This will result in food spoilage and you might not notice it at first.
This will also be a bigger problem if you have a connected freezer and fridge. Any malfunction in the freezer can also be a malfunction in the fridge. When you’re cleaning out the freezer, you should clean the fridge as well, to reduce unnecessary defrosting of the freezer.